GO2SWEDEN SUPPORT GUIDE
This is a Support Guide on how to log into our customer portal. This Support Guide tells you how to stay on the customer portal and give you an overview on how to use it.
First and foremost, when you have been in contact with us, you should have received a link in your email, where you have answered some fields, or where we have answered them for you over the phone. What you need to be aware of now is that you need to log into our customer portal with the E-mail as Username that you have given to us. Next, use your phone number you provided when you last had to fill the contact form and use it as your password. Below you can see what things you need to be aware of to log into our customer portal.
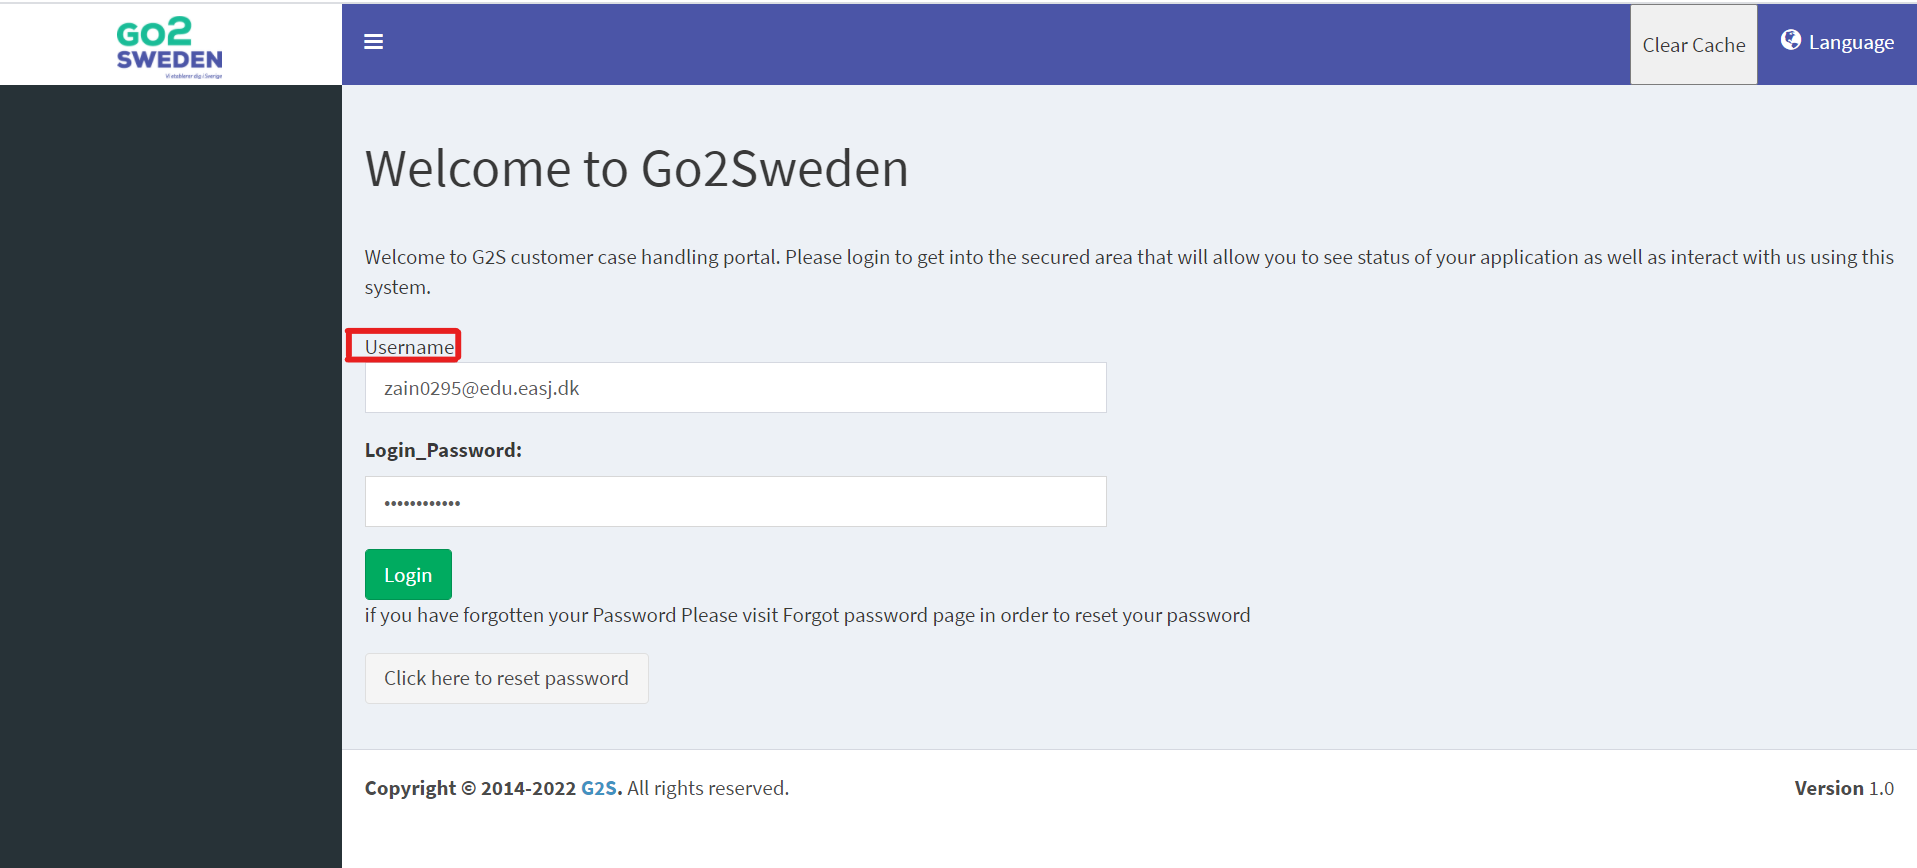
1. You must use your email as username:
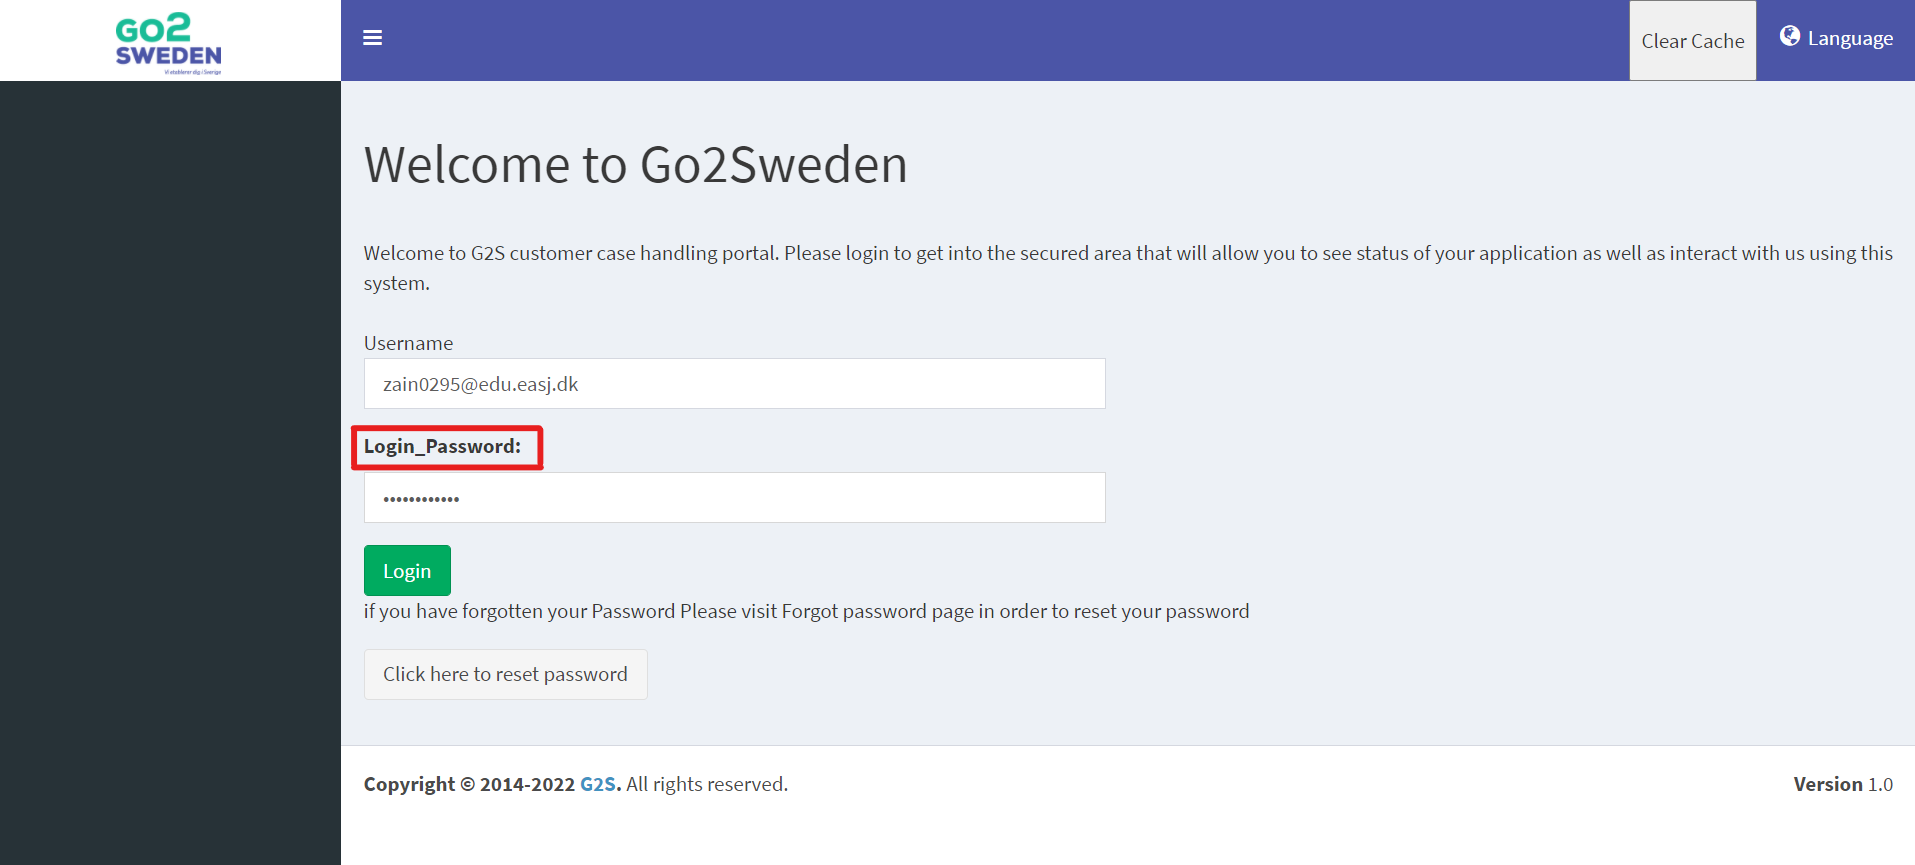
 2. Afterwards you must use your telephone number you have provided before and use it as a Login Password:
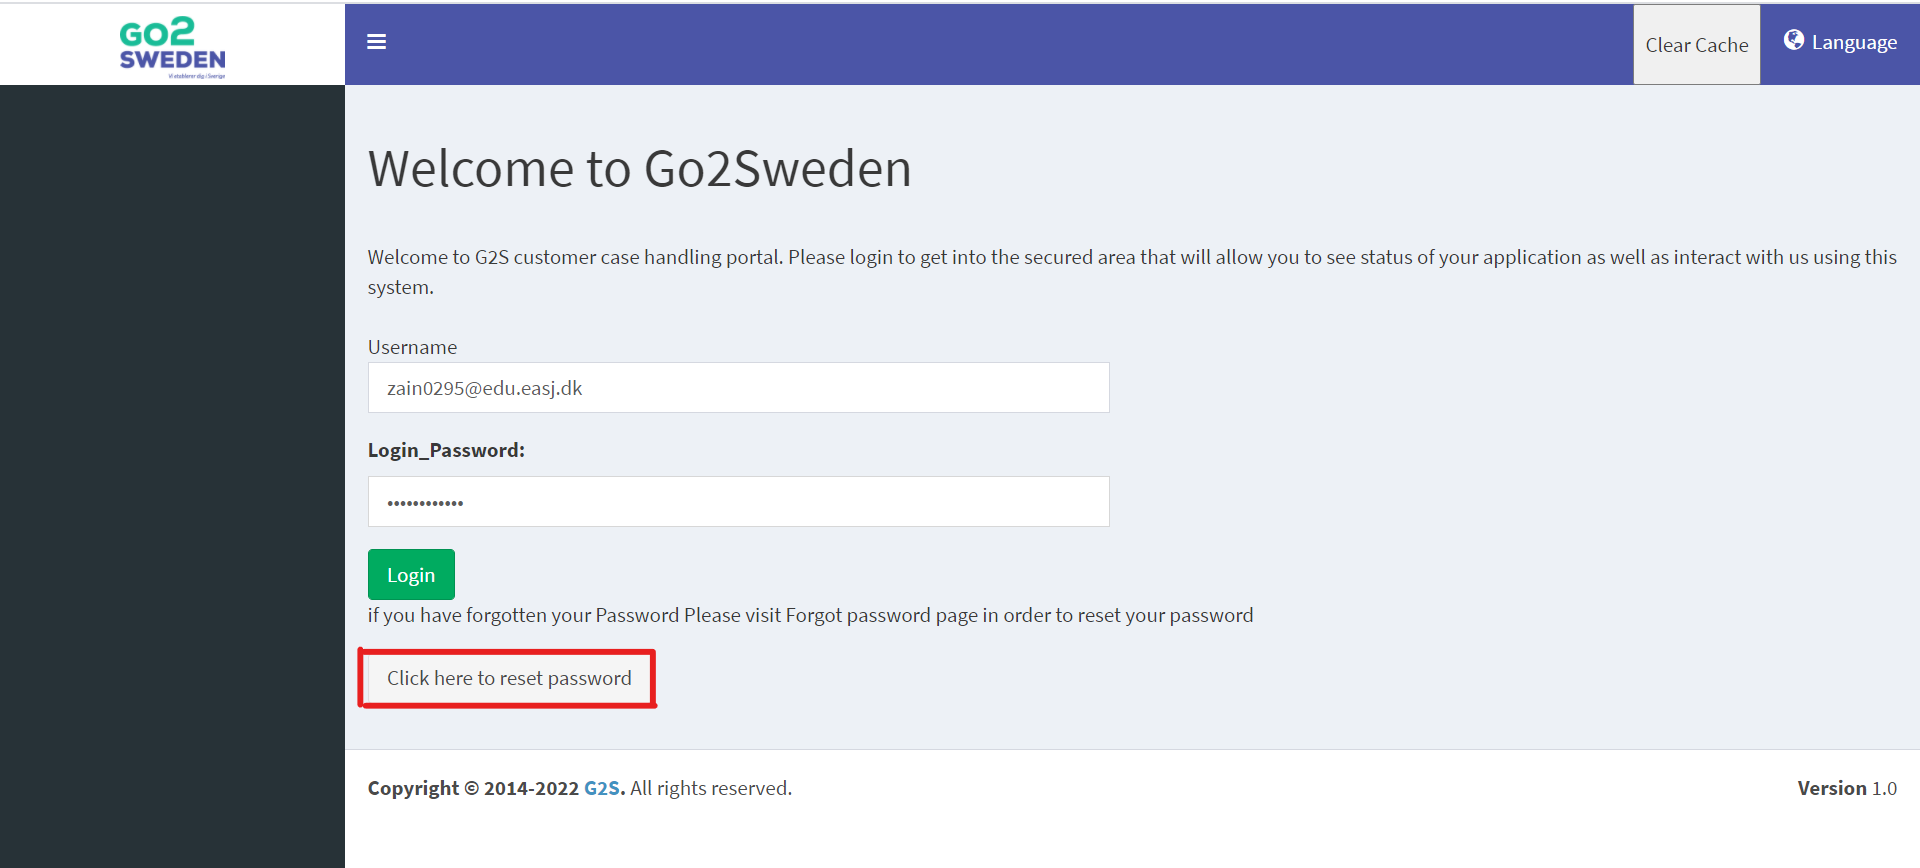
 3. You also have the option to reset your password, as you can see below:
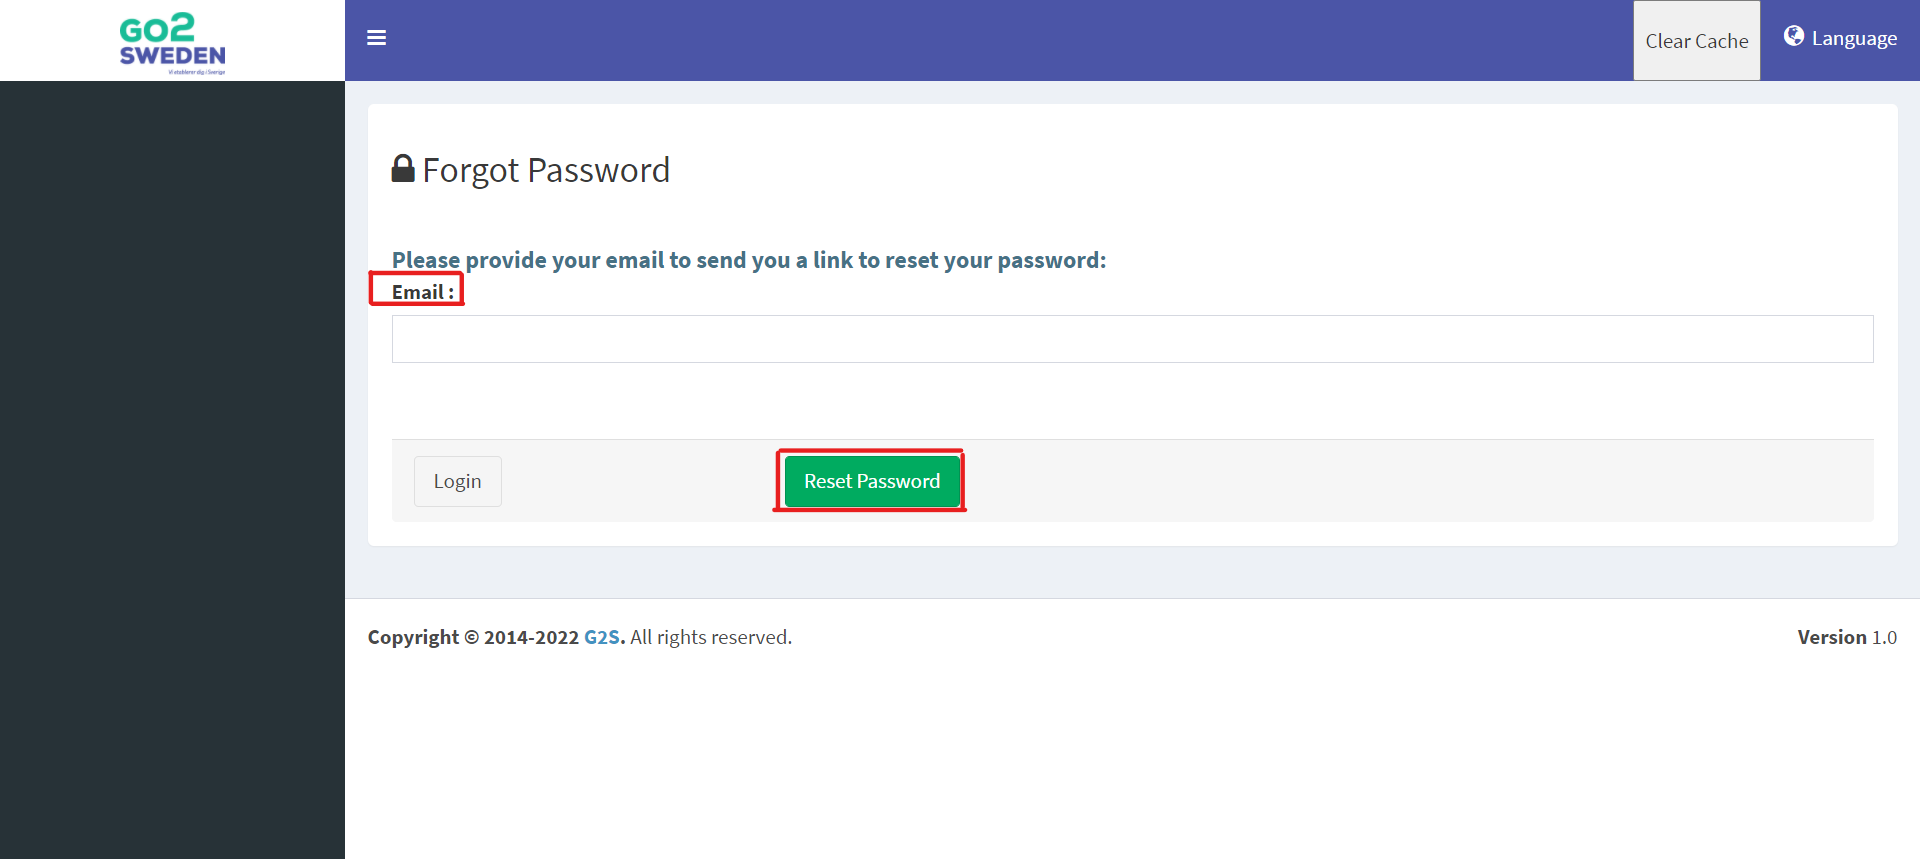
 4. You also have the option to reset your password, where you must fill the field with your E-mail address and press “Reset Password”. As follows it will look like this when you see down below:
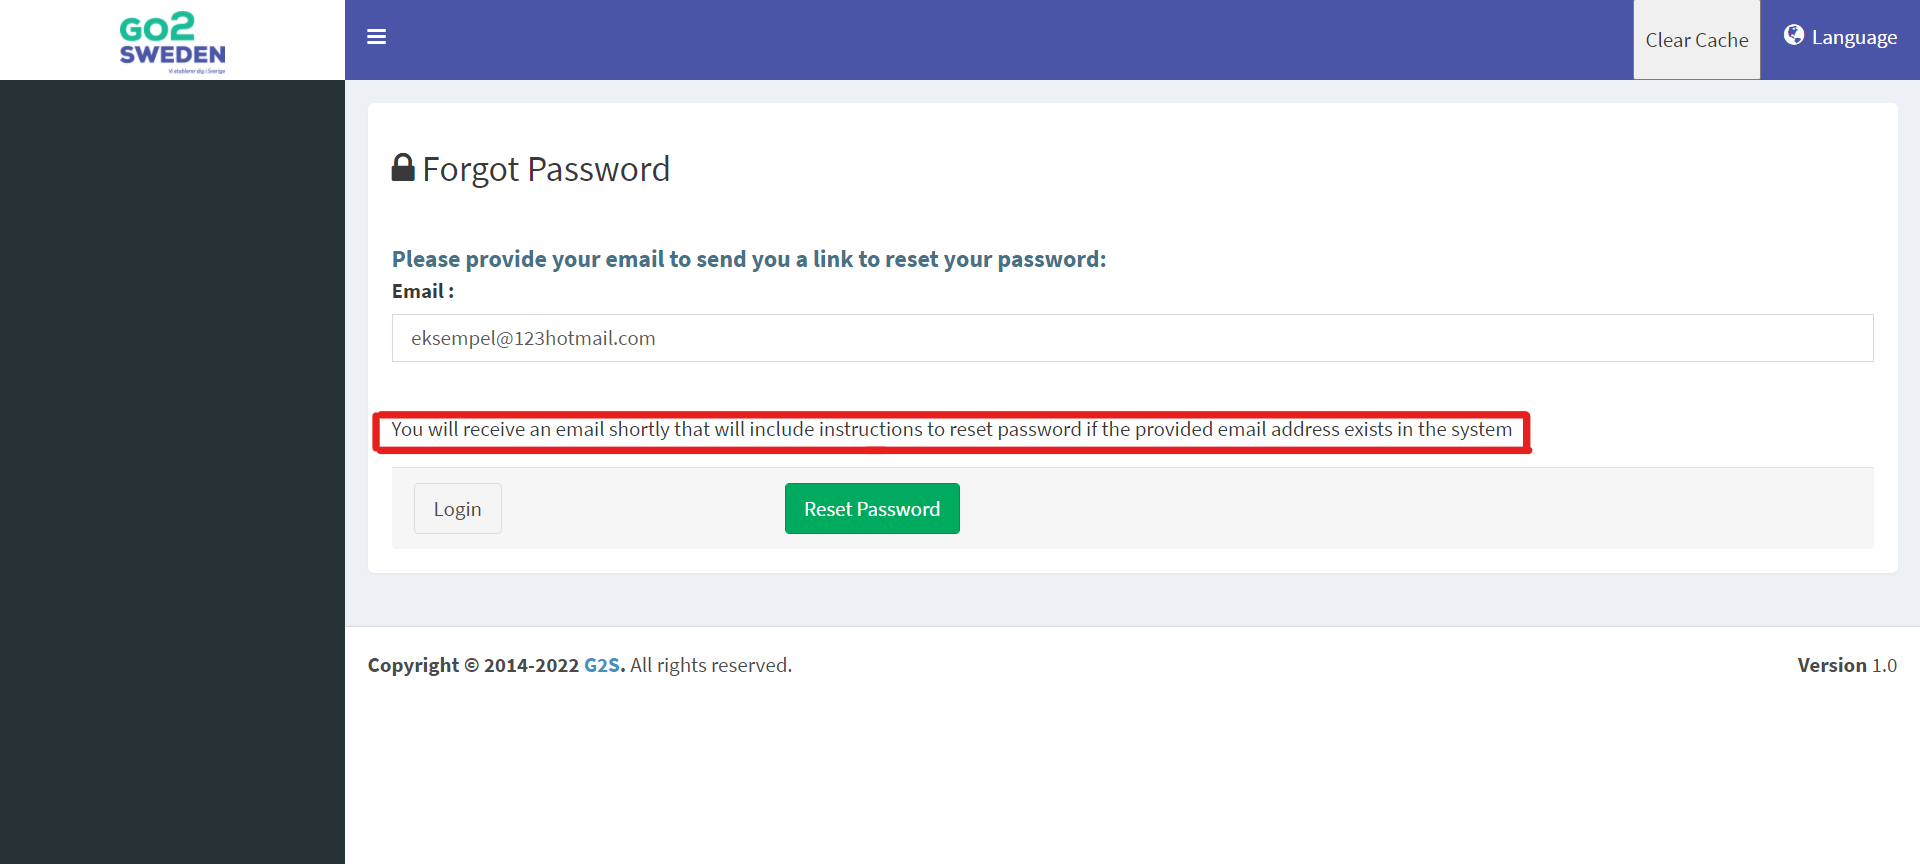
 5. After entering your E-mail in the field, you will receive an E-mail with password reset instructions if the specified e-mail address is in the system:
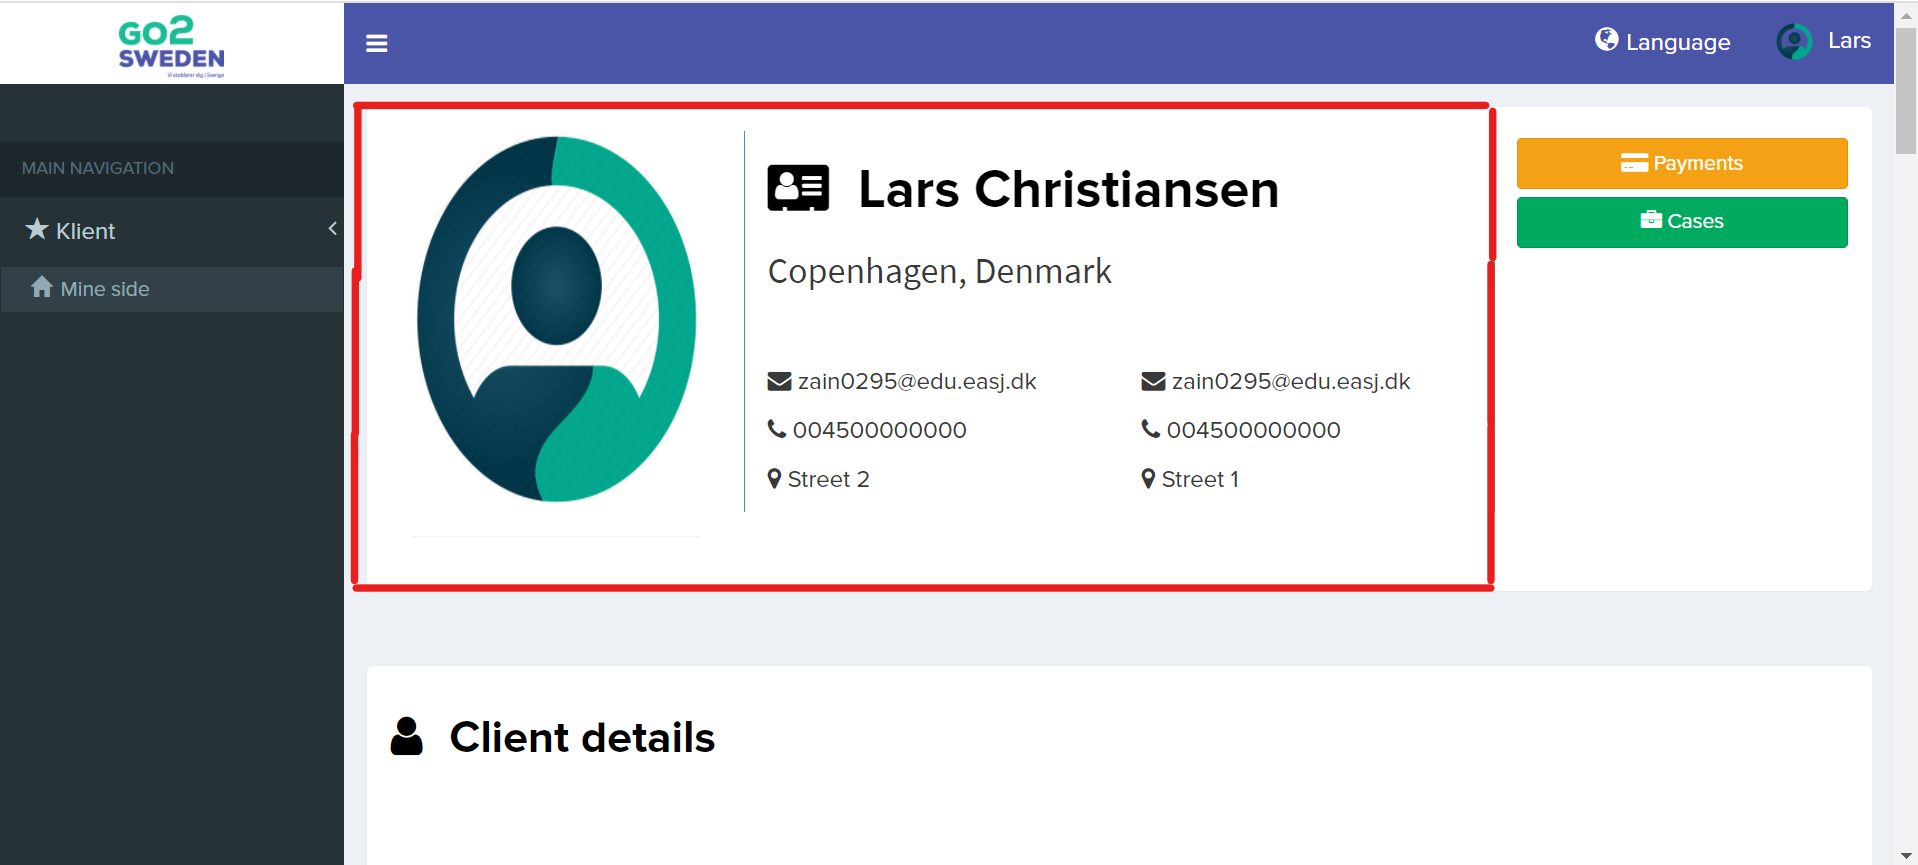
 6. After you have logged in, you can see your information such as E-mail, telephone number and address, which looks like this down below:
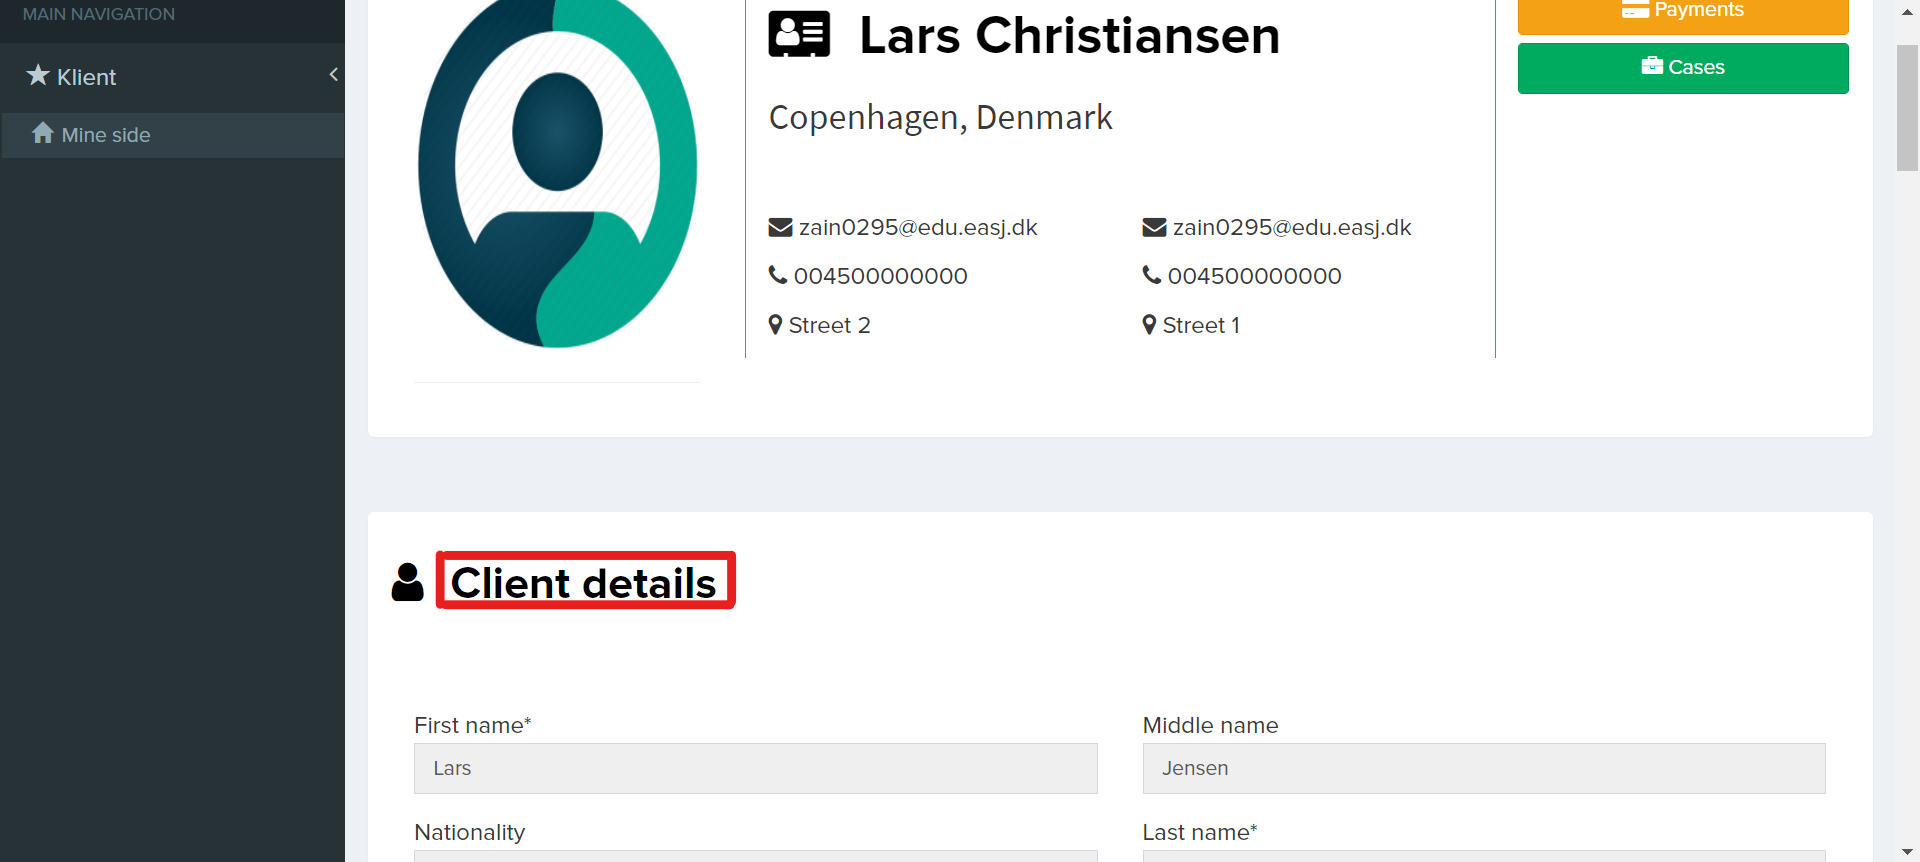
 7. After you have an overview of your Name, E-mail, Telephone number and Address, you can look at the Client’s personal information, which looks like this down below:
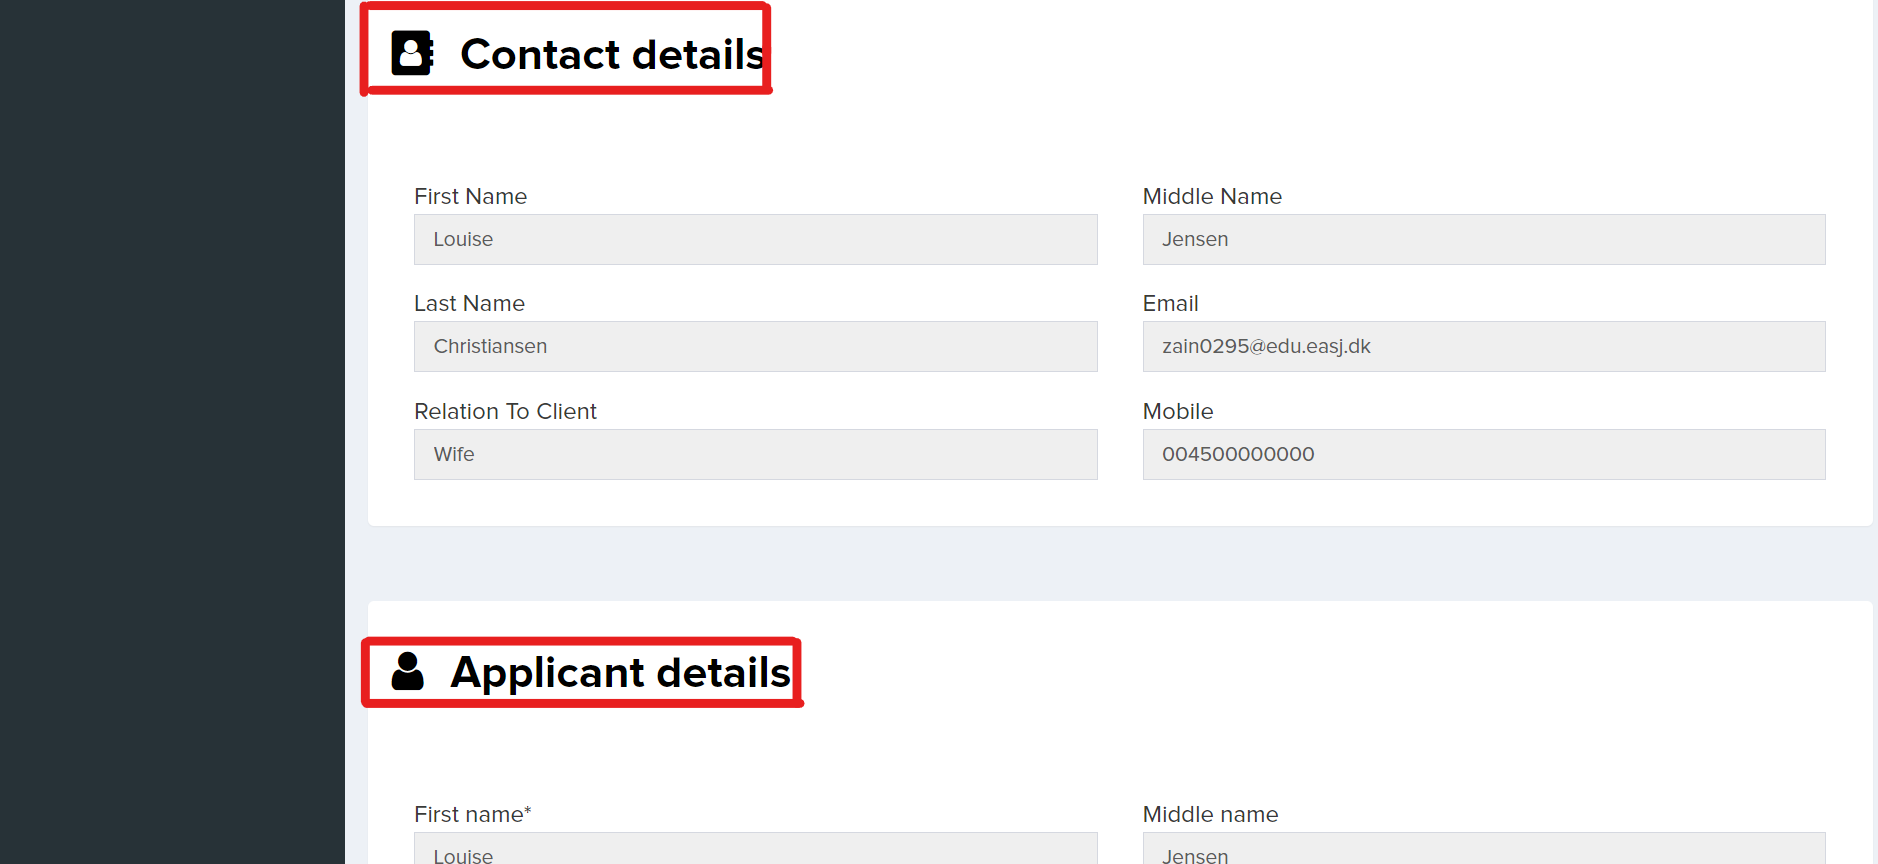
 8. You can also see the Contact and Applicant’s information, which you can see has been filled out:
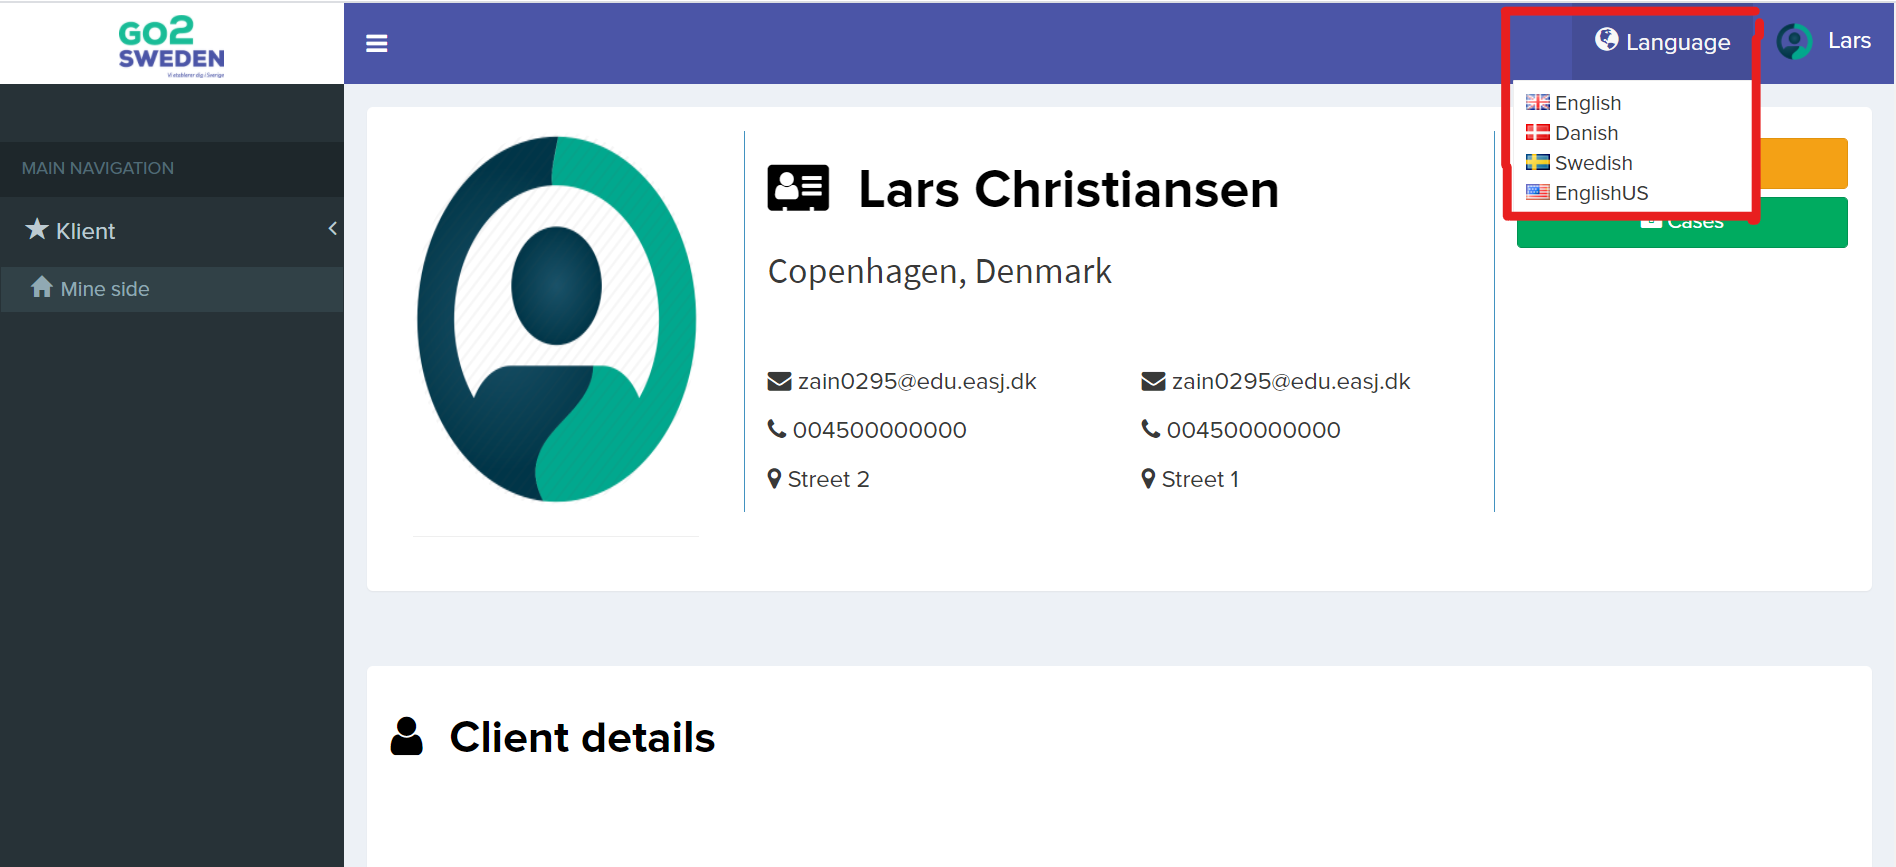
 9. At the top you can choose which languages you want to use on the system, which looks like this down below:
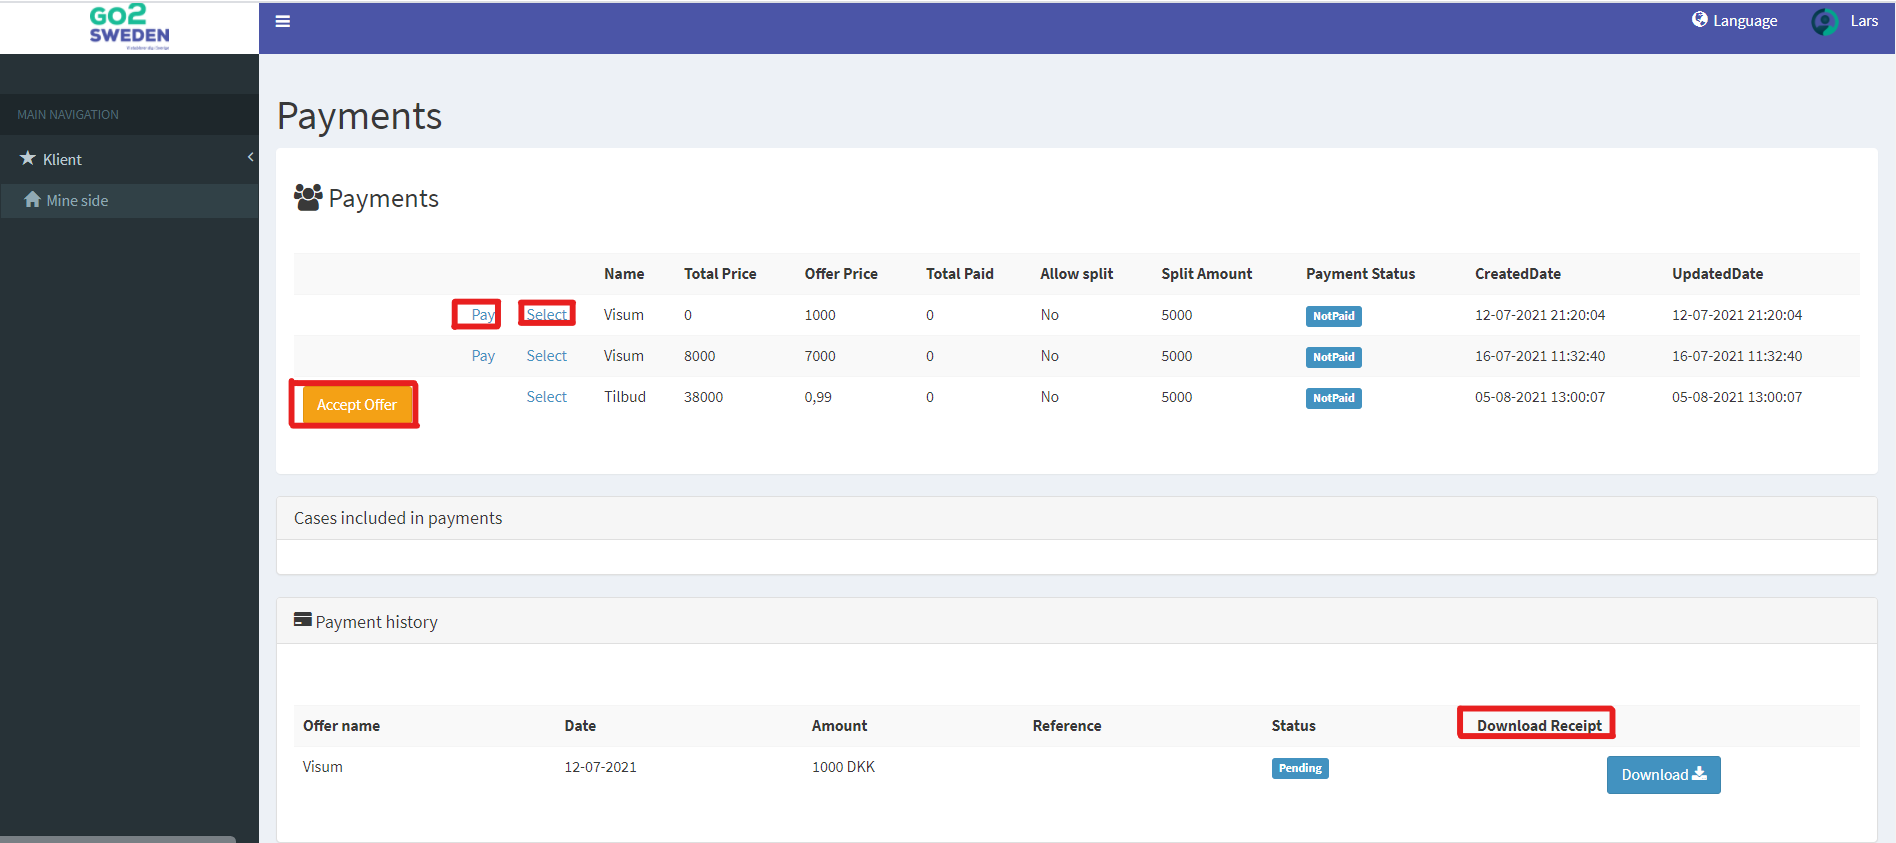
 10. Next you can see 2 option which is called “Payments” and “Cases”. If you press on Payments, you will you offer and payment history you have selected and accepted:

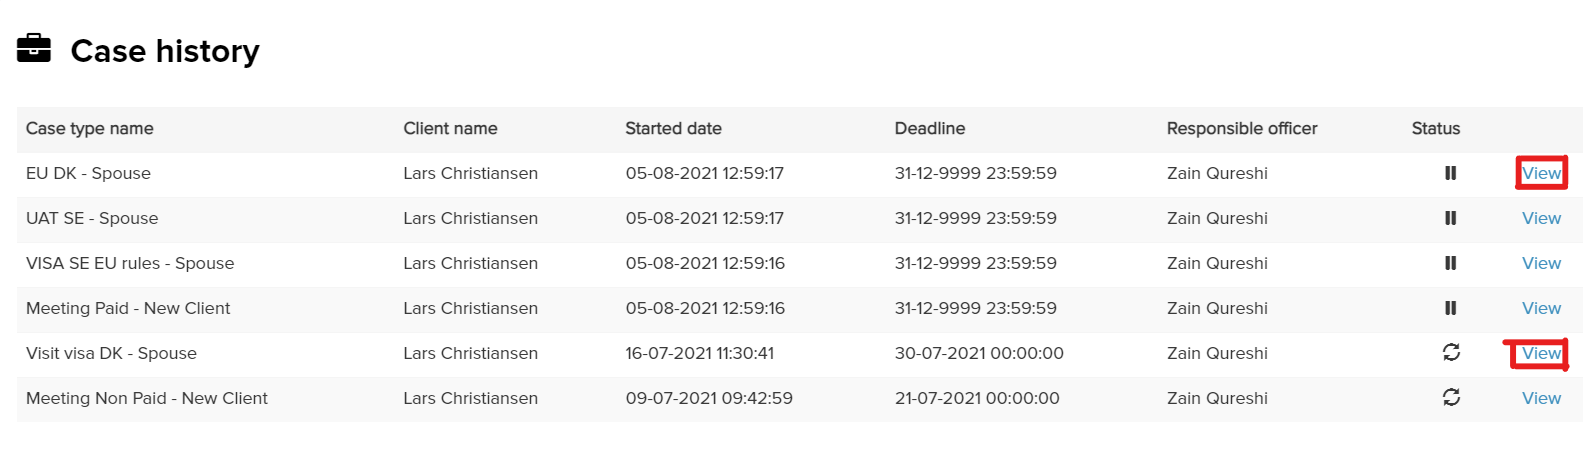 15. Once you have pressed “View”, you will enter the specific case, which consists of “Case Details, Messages, Checklist and Files”.
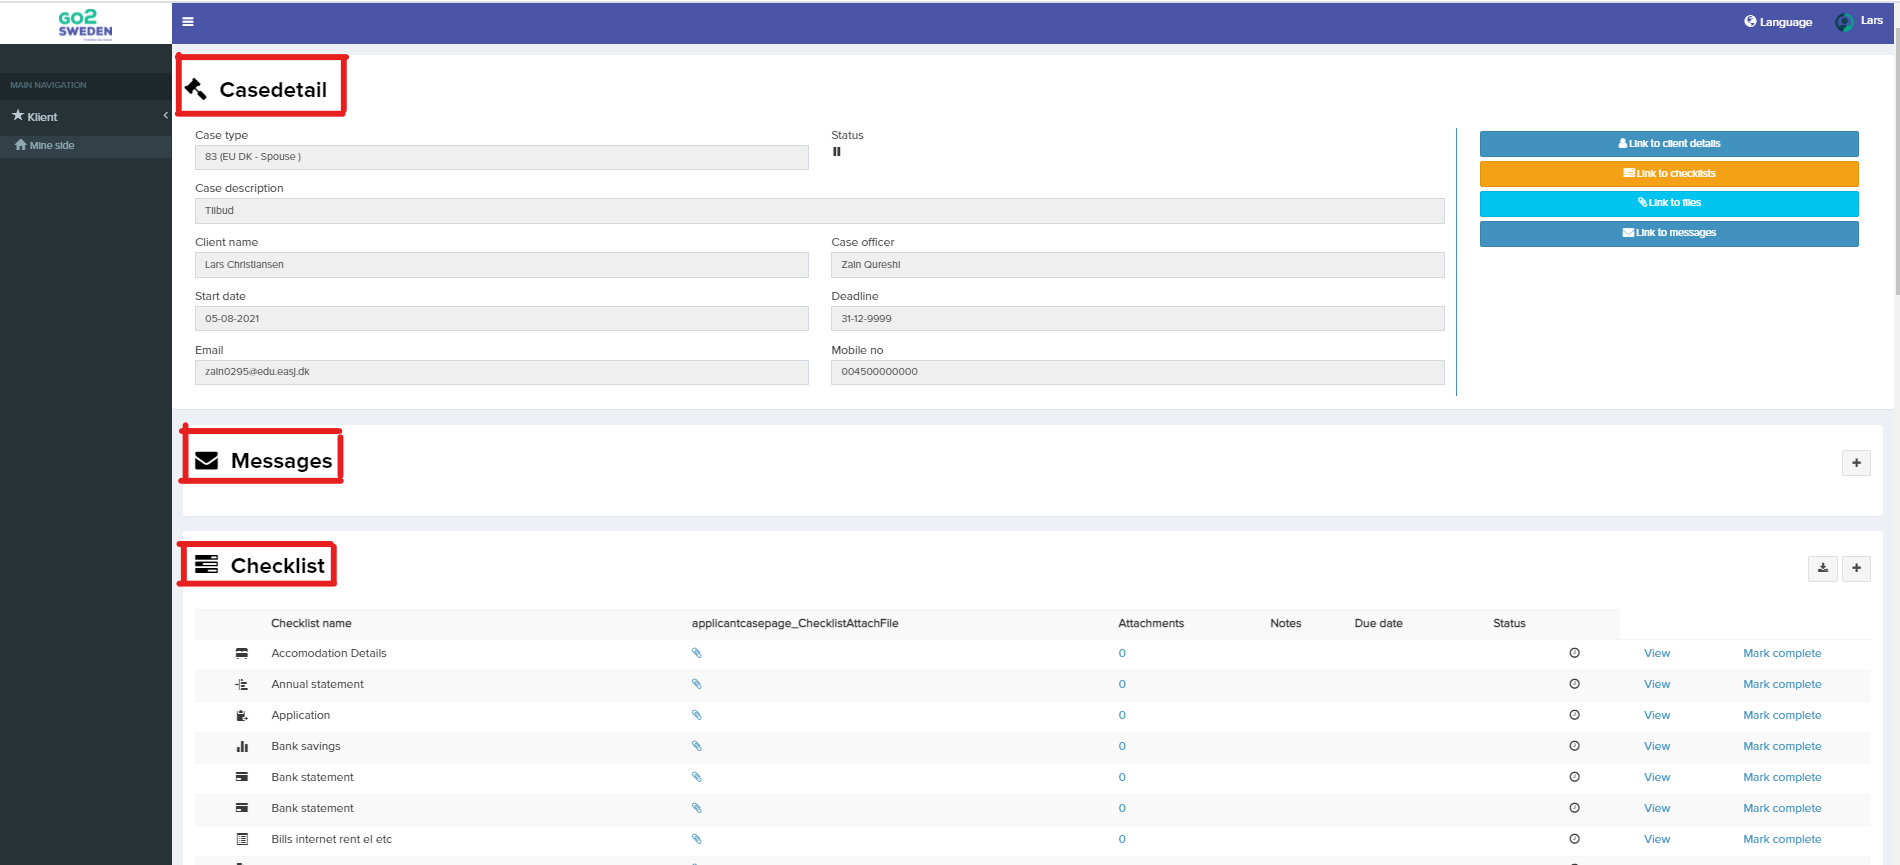 16. When you see” Messages” you have an option to press the + icon, where you can send an internal message to your caseworker.
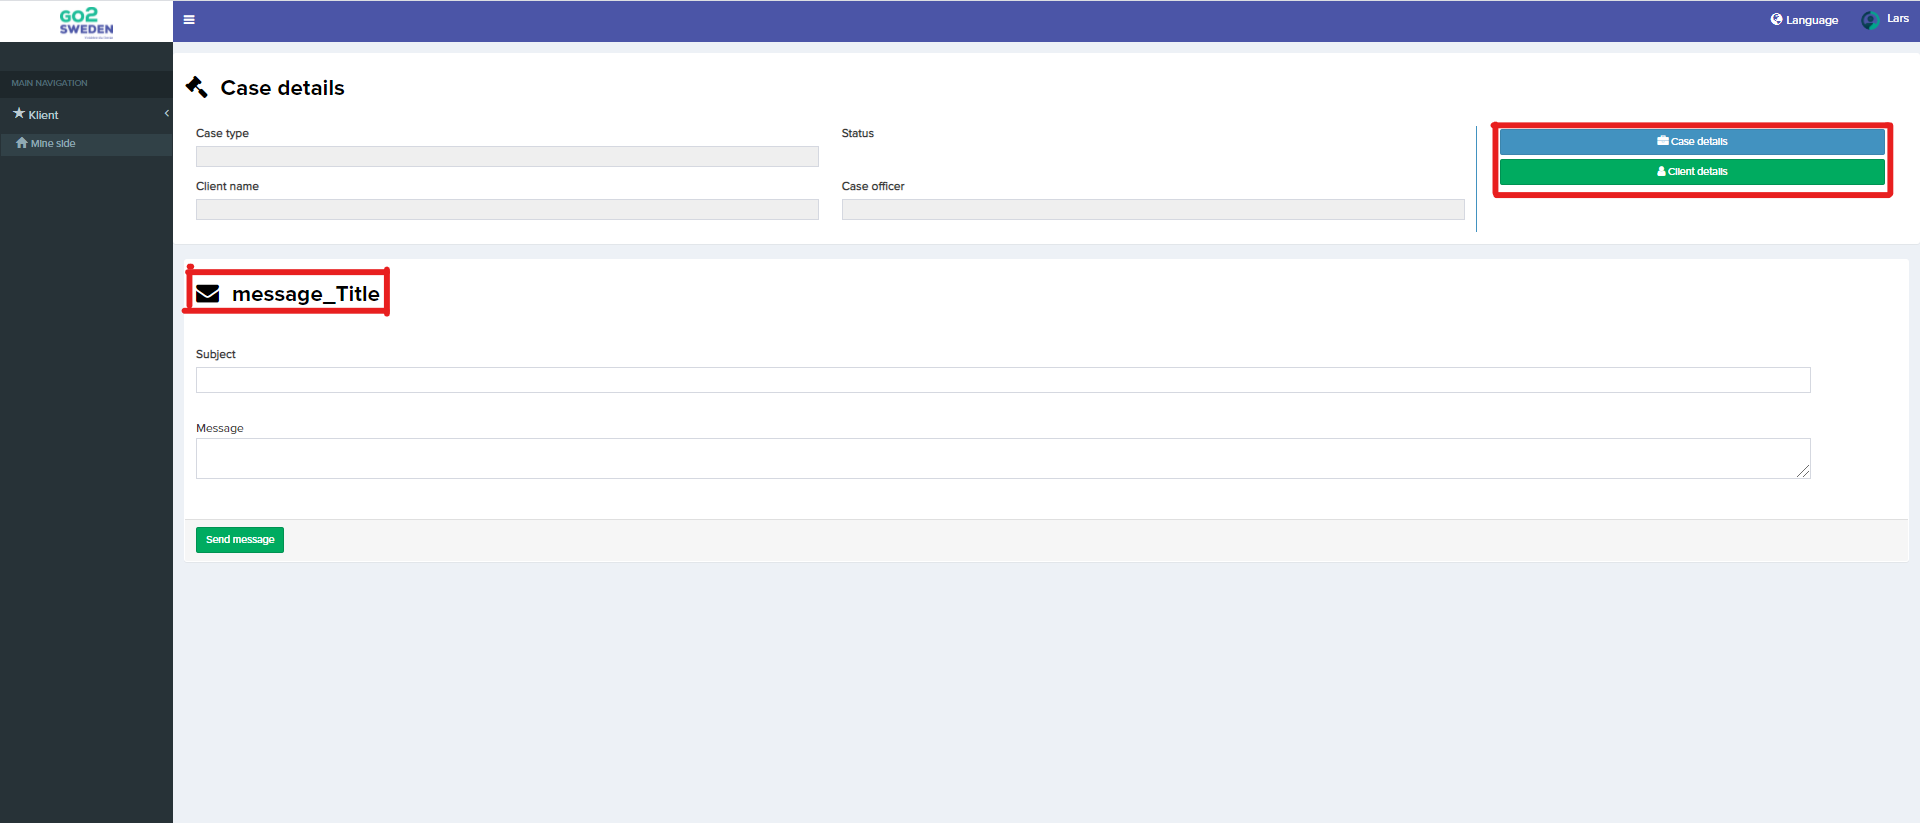
 17. After you have pressed the + icon, to create a message, and overview of case type, Client’s name and case managers name will appear. Then you can down below write a subject for the message, and afterwards write the message and press on “Send Message. At the top right you have an option to press “Case Details”. “Case Details” will show you the details of the case, whereas “Client Details” will show the Client’s information.
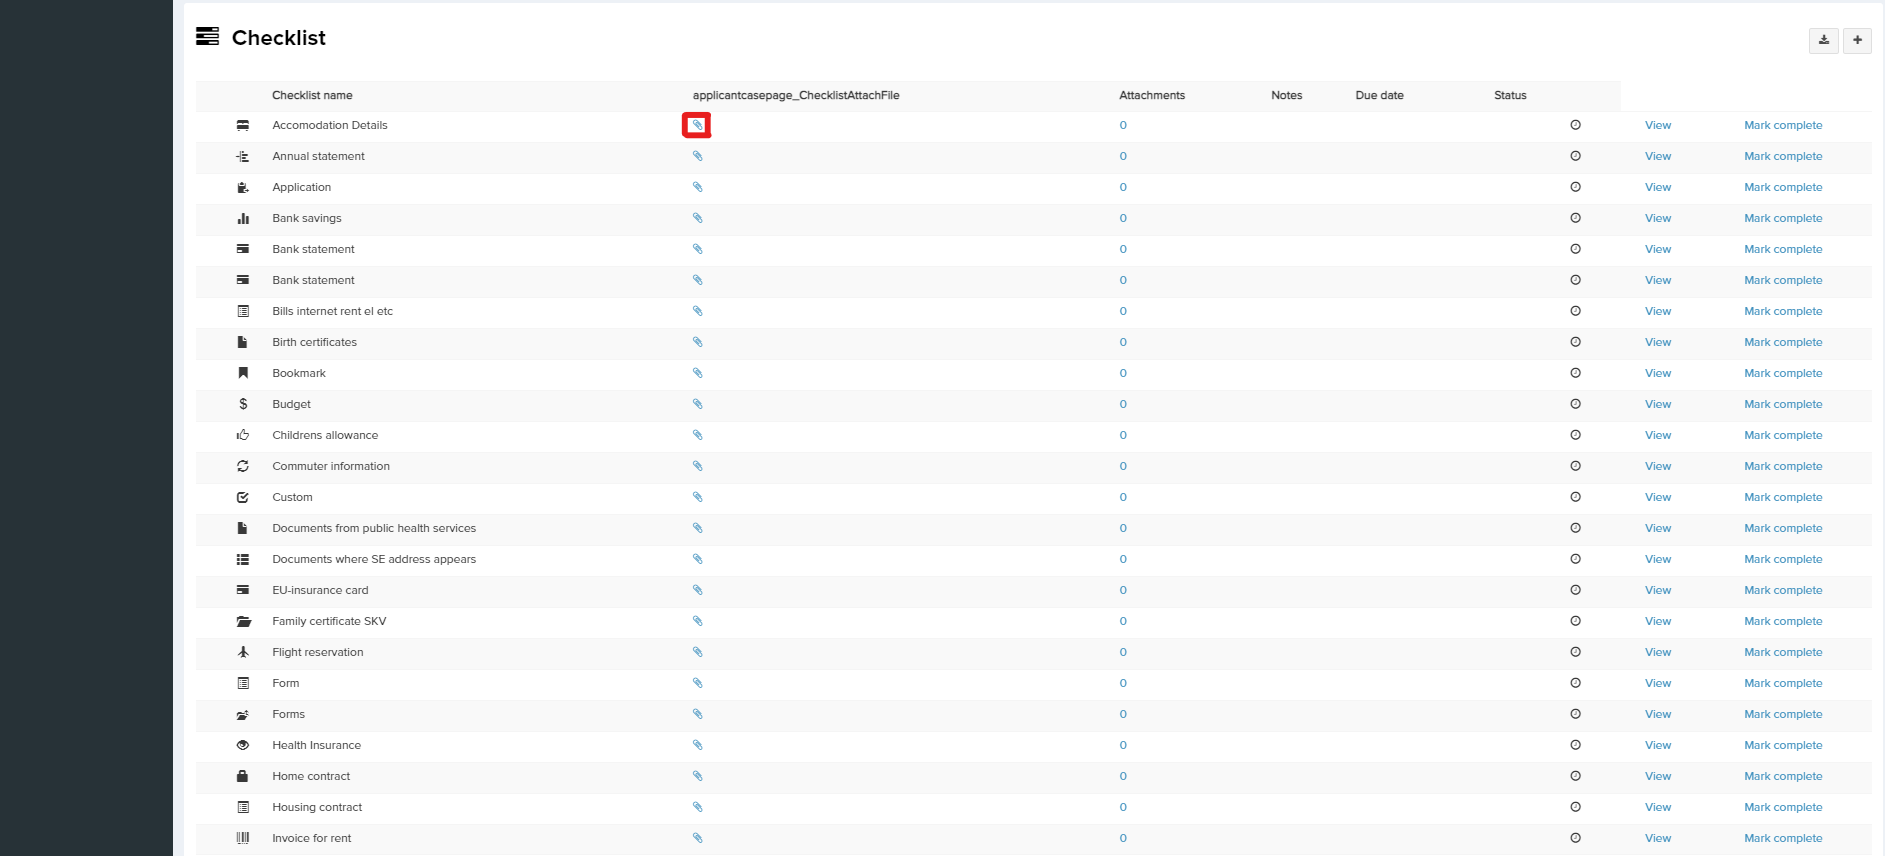
 18. Below the messages there is Checklist. The Checklist can consist of several different things, but it all comes down to which package or Casetype you have chosen. There is a pin icon where you upload all the documents one by one, so you can also see for yourself that you have uploaded. So by pressing on View, you will see what you have uploaded. Afterwards you press on mark complete if you mean, that you have uploaded the proper and correct document.
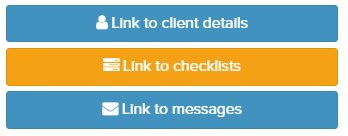
 19. At the very top you can more options. The options are thus, “Link to Client details”, Link to checklist, Link to files and Link to messages”. If you click on “Link to Client details” you will gain access to the Clients information. “Link to Checklist” is a faster solution to get down to the checklist, so you do not have to scroll the mouse down. The same method applies to “Link to Messages”, which Is a faster way to get where you want.